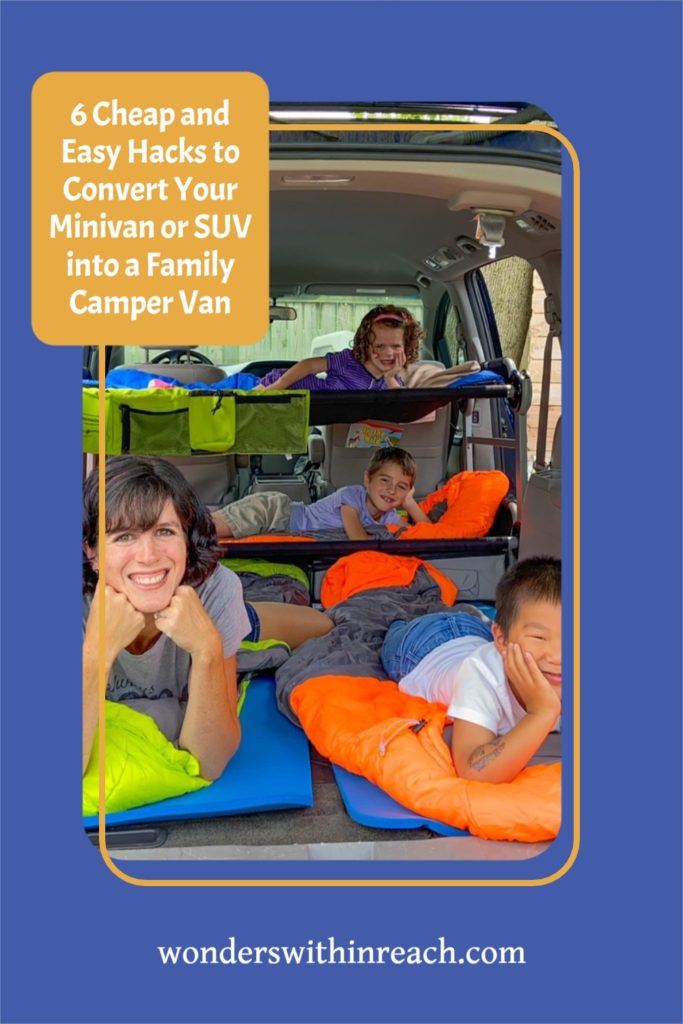
Build Your Own Camper Van for Less Than $400

This is the way to travel now, right? Everyone seems to be selling it all and living in the van.
But what if I want to keep it all, including my soccer van, and still travel the world in a camper van?
We looked at trading in the minivan for a Sprinter or other van we could convert into a camper, but not only would it still cost us more than the equivalent of $300 nights in a hotel, we would lose the fuel efficiency and practicality of the minivan we already have. Investing in a camper as a third vehicle was just beyond our budget limits.
So, we had to get creative! Here’s how we turned our minivan into a campervan! It’s simple enough to put together for weekend travels, and take it back apart to have the van ready for the carpool by Monday morning. The low cost is almost mind blowing. This is great for up to five people.
“While Sprinter vans may catch your eye, they’re not the most budget-friendly option for families interested in short-term travel. Minivans, on the other hand, are a great choice. They’re easy to drive, affordable to convert, and provide good fuel economy.”
– Taran Causey, Darien Overland
**Amazon links are provided for convenience, and I earn a small commission, but I’m not at all offended if you find them shopping local!**
Hack #1: Bedding
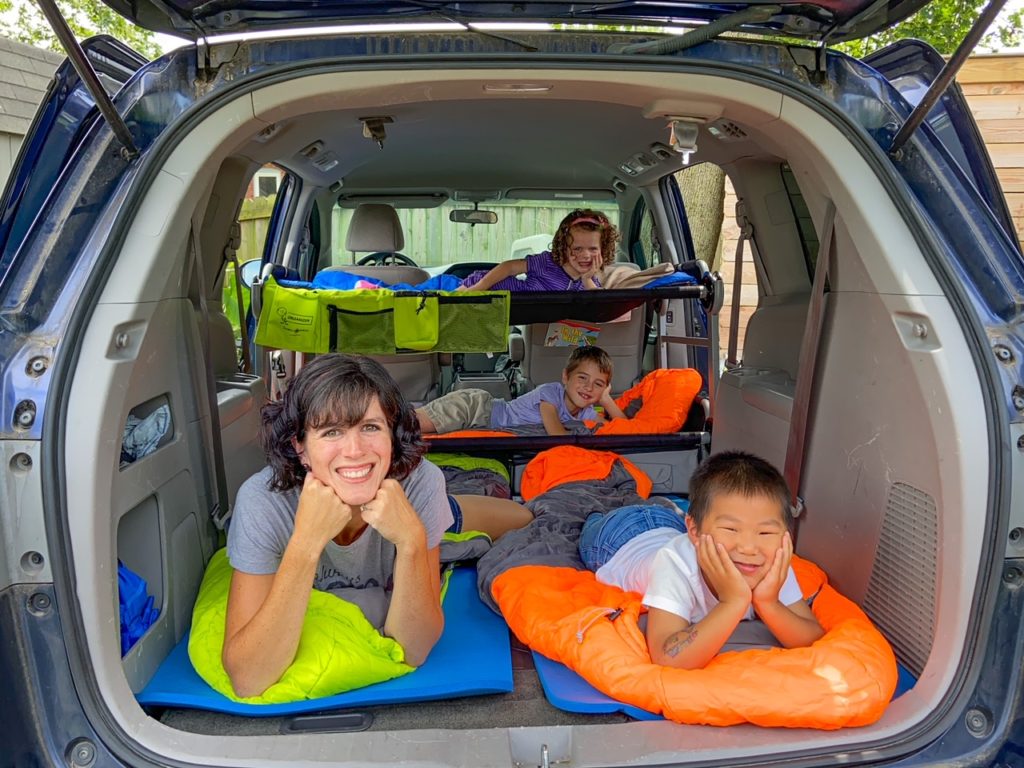
This is the crux of the whole operation. How do you fit bedding for five in a minivan? Of course you take the middle row out, and then you can fold down the back seats at bed time, but that only fits up to three.
(To easily fit three across in the back seat, we love our BubbleBum booster seats. They surpass safety standards and are light and narrow for easy carrying and tight fits… AND I earn a commission if you use my link.)
Use your vertical space! We talk about this for storage all the time, so I don’t know why no one’s doing this for bedding!

We use the KID-O-BUNK youth cots from Disc-O-Beds. The bunks are 65″ long – the exact width between van doors. We drive a Honda Odyssey, 2016, which is in that three year time frame where they made them a little narrower. As far as I’ve found, the single cot should fit in any minivan and most SUVs. Obviously, measure first! If you have one of the narrower vans, like ours, a little more finagling is required to stack them. You could just cut a few inches off of the poles, but then you won’t be able to use them full size. We actually bought a fencing post of the same width at Home Depot. We use the short posts for stacking in the van, and the originals everywhere else.
The bunks are high enough off the ground to fit storage… or feet… under them. We put two kids on the cots, and the remaining three of us get the van floor.
The bunks range from $278.99 to $349.99 on Amazon (depending on color choice), and they come with the hanging organizers for brilliant storage that doesn’t take up much needed space. This is the biggest expense of your van conversion and is about to turn you into a hotel on wheels.
I leave the bunks up for the duration of the trip and the kids enter through the back door. They’re snug enough that they don’t move at all while driving. You can also take them apart in the morning before any long drives.
Turning your floor into a mattress

We’ve tried just putting sleeping bags on the floor, but the metal that holds the seats in is painful to sleep on. We’ve tried using an actual mattress, but it’s hard to fit, and doesn’t leave any space under the cot. Instead, we use two Wakeman sleeping pads. They’re the perfect width to fit two side by side, they’re only about an inch think and fit nicely under the cots, and they’re foamy enough to smooth out all holes and ridges under your body. These run $18-$20 based on colors and availability.
Total bedding cost: $340 (bunks and two mats )
The fluffy stuff
We’ve traveled with blankets and pillows from our own beds, and that can be fine depending on where you’re headed and the temperatures you’re planning for. If you’re headed into the cold, sleeping bags can be a better choice for warmth, space, and travel convenience. We love our Cascade Mountain Tech sleeping bags because they keep us warm when it’s cold and they pack up super small and light. (Last I checked those were out of stock. I also love my XL MalloMe – for super tall people.)
Hack #2: Storage
This is the second most important thing for managing living out of your van, and the only other “requirement” before hitting the road. Every hack after this is just adding to your level of posh.
Storage is essential for maintaining sleeping space. Keep in mind, you can only use the back of your vehicle for storing sleeping essentials, since those come out at night. Everything else needs a home somewhere else, since you lose your trunk at bed time. The only thing in our trunk is the wheelchair and our sleeping bags. We take the wheelchair apart and put it in the front seat at night.
The length of your trip will determine how much storage you need. For a weekend trip, we can fit everything we need into one Kid-O-Bunk Footlocker ($52 after the discount code of Wonders2021). It’s made up of four spacious sections. We use two for clothes, one for food, and one for medical equipment and camping gear. The footlocker is designed to fit perfectly under the cots, and because of the way the cots fit in the vehicle, they slide up by the front seats and only take about half of the cot space. We only do one footlocker on any trip, because I’m 6′ tall and need the leg space under the cot! Depending on your travel buddies, you may be able to do two.

For longer trips, we add a hanging closet organizer. You can go all out for something with drawers and organization, or keep it simple with straight shelves. While I did link options for convenience, you can also get these at your nearest Five Below for $5. If you’re really lucky, occasionally you can even find a small one at the Dollar Tree! Since we only need the storage for longer trips, we just take the one from Wesley’s closet, and put it back when we’re done.
Now, where do we put it? If we’re traveling without dad, I hang it in the front seat, attached to the oh-crap-handle (that’s the official name, right?) and the visor. If we need all five seats, I take out the center organizer (I know that sounds counterproductive, but we can’t shove everything we need for a week in that little bin) and put it there. You can jerry rig it to hang from the headrests, or just fill it and let it collapse as you use things. If that’s your method, just be conscious of what you’ll need when.
*Don’t forget a first aid kit. We like this one because it has all the things, and still packs up small.*
Total storage cost: $57
Hack #3: Cooking and Eating
This can vary greatly by the type of van-living you plan on. You can go out to eat, you can pack meals that don’t require cooking, you can stick to meals that you can make in the van, or you can go all out with a camping stove.

We started with only packing meals that didn’t require cooking, or that could be made with just boiling water. Think things like pasta, mac and cheese, and ramen. If you want to get fancy, you can get those just-add-water adventure meals. We had a 12 volt thermos, but it broke on our first long trip. Now we’re trying just the heating element, since that’s the essential piece and there’s less that can go wrong. The only down side of this is that you still need a thermos or something to boil water in. Any to-go mug that keeps things hot should work! This way everything can be done without leaving your van.
If you’re staying at campsites or in the wild, you can expand your menu to things you can grill, or consider packing a single burner propane stove to cook whatever you want! A single burner is only $32.99. If you really want to go all out with gourmet, you can get a double burner. To this point, I haven’t messed with many perishables because I’m not a chef and I don’t want to pack that big of a cooler. At this point, my perishables can fit in a lunch box that fits in my organizer. You can google “best camping foods” for great menu options – that’s not my specialty!
Hack #4: Making it Dark
Again, not an essential, but I’ve found the darker I make it, the longer the kids sleep… so I want it dark!

Foam sheets over window
You can get a stick-on room darkening window film for everything (only $7.50 a roll)- which keeps out all light, but I hate having to re-put it up on all the windows.
For this summer, I taped together a few foam sheets to hang in the back windows. Because they just slide over the window hooks, the kids can hang them up when it’s time to go to sleep, and take them down in the morning. It took me five minutes to make them, and it’ll take five seconds for installation each night. At 15 cents a sheet, it cost me a total of $1.20 for both sides.
I just use the quick magnetic shades for the sliding doors, and I take a fleece twin blanket and hang it from the visors for the windshield and front windows (it’s long enough to wrap around). This way it takes less than two minutes to prep the van for bed time, and about ten seconds to tear down in the morning. Actually, you can do that for the back window, too – just put a blanket over the trunk liner and then close the door – instadark!
For any of these products, double check measurements!

Hack #5: Oh Poop
If you’re staying at campgrounds, or using this as an idea for staying at rest stops or in towns along the way, you don’t need to worry about toileting.
If you’re planning to go off grid, you need to think about what to do for a bathroom. I know plenty of people just pack a shovel and bury it. I have kids with physical disabilities and medical needs, so we need an actual toilet. My kids are picky and prefer something that feels like an actual toilet, so we started with this camping toilet. When we forgot that on a trip, and had to grab something at Home Depot, we upgraded to a little tripod. Because my son with Spina bifida struggles to sit independently, he managed to tip both of those over while on them. Eww. We’re going to upgrade to a handicap camping seat for the next round, so we don’t have to worry about stability.

Hack #6: Making it Posh
Look! We’ve already totally transformed your van! Your campervan conversion can be set up in less than 20 minutes, and you take it back down after you’re done. Your minivan or SUV can do it all!
For warm nights, we snagged some window screens. Unfortunately, those can only pull over SUV doors, or the front doors of the minivan. If you want something for a sliding door, you can cut these and use magnets, or just pick up some tulle to attach. We attached this light tulle with a bit of Velcro tape. You don’t even need both sides of the tape (as I discovered half way through) – the tulle sticks to the rough side of the Velcro!
Need it even cooler? Add a battery powered fan and lantern.
It would be wise to keep a portable charger with you – both for charging your devices and for jump starting your van when you accidentally leave something on overnight in the middle of nowhere. This one is small enough to fit in your glove box, and holds up to five jumps.
I keep a container of water on the floor in the front, with soap and a towel in the door for easy clean-up on the go. We travel with quick-dry towels to save on both space and mildew.

Because camping is dirty, I have the kids take off their shoes before they get in the van. Otherwise, it gets really dirty really fast.
Don’t forget you can use the seat backs in the front row for book storage.
We buy snacks that we don’t typically eat at home, as a way of keeping the adventure alive.
If there’s anything I didn’t cover, feel free to reach out! I’m really excited about this new found freedom, and I’m happy to help you hit the road!
Accessibility
This is not a footnote: it’s the center of everything we do. I just wanted to make a quick note that part of the reason we do everything IN the van is so that we’re not relying on accessible camping pads or navigating the outdoors. With this set up, Jaden doesn’t have to go anywhere or navigate anything to eat or sleep. When necessary, we’ve even set up the toilet inside before transitioning to bed time. This has been a great accessibility hack for navigating camping for us. Camping in a minivan is our version of accessible camping.
My future articles will go back to accessible trip agendas, but this has made a huge difference for us, and I wanted to share!
Need a good place to start camping? Check out our favorite from last year!
Frequently Asked Questions
1. Can I convert any minivan into a camper?
Most minivans can be adapted for camping, but always measure carefully before purchasing bunks, pads, or organizers. Models like the Honda Odyssey, Toyota Sienna, and Chrysler Pacifica are especially popular because of their roomy interiors.
2. How many people can sleep in a converted minivan?
With creative use of space, a minivan can sleep up to five people—two on cots, and three on the floor with sleeping pads. The exact number depends on your van’s size and your people’s size.
3. Do I need to permanently alter my van?
Nope! This setup is completely removable. You can transform your minivan into a camper in about 20 minutes (it takes us longer with packing included) and then return it to “soccer van” mode for the school run.
4. How much does a DIY minivan camper conversion cost?
This build can be done for under $400, depending on which items you choose and what you already own. The bunks are the biggest investment, but they’re versatile and can be used outside the van, too.
5. Is it safe for kids to sleep in cots inside the van?
Yes, as long as you’ve secured the cots properly and your van is parked on level ground. We’ve found the Kid-O-Bunk system to be stable, snug, and designed with families in mind. Do not drive with kids in the bunks.
6. What about bathroom needs while camping?
If you’re camping at campgrounds, restrooms are usually available. For off-grid camping, a portable toilet is a practical solution—especially for kids or anyone with mobility challenges.
7. Do I need special tools or mechanical skills to set this up?
No tools or permanent modifications are needed! This conversion relies on portable items that assemble quickly and pack down small. My kids can put the bunks together on their own.
8. Is this setup accessible for kids or adults with disabilities?
We designed our system so everything can be done inside the van, avoiding tricky terrain or inaccessible camp pads. That makes it accessible for us. Even toileting can be adapted for indoor use if needed… but that’s kind of gross and we avoid it when we can.
Minivan Camper Conversion Shopping List
Here’s a quick list of the essentials (with links for easy shopping):
Bedding & Sleep Setup
- Kid-O-Bunk Youth Cots (bunks for two kids, with built-in organizers)
- Wakeman Sleeping Pads (thin but supportive, smooth out bumps)
- Sleeping Bags (warm, lightweight, and packable)
Storage & Organization
- Kid-O-Bunk Footlocker (fits under bunks, divided into 4 compartments)
- Hanging Closet Organizer (budget-friendly option for longer trips)
- Compact First Aid Kit
Cooking & Food Prep
- 12V Heating Element (boils water for simple meals)
- Single Burner Propane Stove (budget cooking upgrade)
- Insulated To-Go Mug/Thermos
Comfort & Convenience
- Room Darkening Window Film
- Foam Sheets (cheap, easy blackout option)
- Magnetic Window Shades
- Portable Camping Toilet
- Portable Charger & Jump Starter
- Battery Powered Fan & Lantern
- Quick-Dry Towels
Bonus Hacks
- BubbleBum Booster Seats (lightweight, narrow, perfect for road trips)
- Tulle Fabric + Velcro Tape (DIY window screens)